News&Knowledge from SgQ
How to Measure Curved Aluminum Work for an Accurate Price Estimate: A Checklist for Technicians Before Sending the Design
To measure curved aluminum work for an accurate price estimate, you need to measure more than just width × height. Six key points must be specified: opening width (measured at multiple points), total height, straight-section height before the curve begins, curve radius, curve style, and wall depth. Photos of the site and the preferred window or door system should also be provided. The more complete the information, the more accurate the price estimate and the lower the chance of production errors.
✍️ Written by: SGQ Team (SmartGlassQuality Khlong Sam)
📅 Last updated: July 7, 2026
- Why Is Measuring Curved Work Harder Than Straight Work?
- What Measurements Are Needed Before Requesting a Quote?
- No CAD Drawing? What Should You Send to the Supplier?
- How Does the Door/Window System Affect Size Measurement?
- Common Mistakes Installers Make
- Tools and Methods for Measuring Curve Radius On-Site
- Information Checklist Before Requesting a Curved Work Quote
- Summary: How to Measure Curved Aluminum for an Accurate Quote
- Frequently Asked Questions (FAQ)
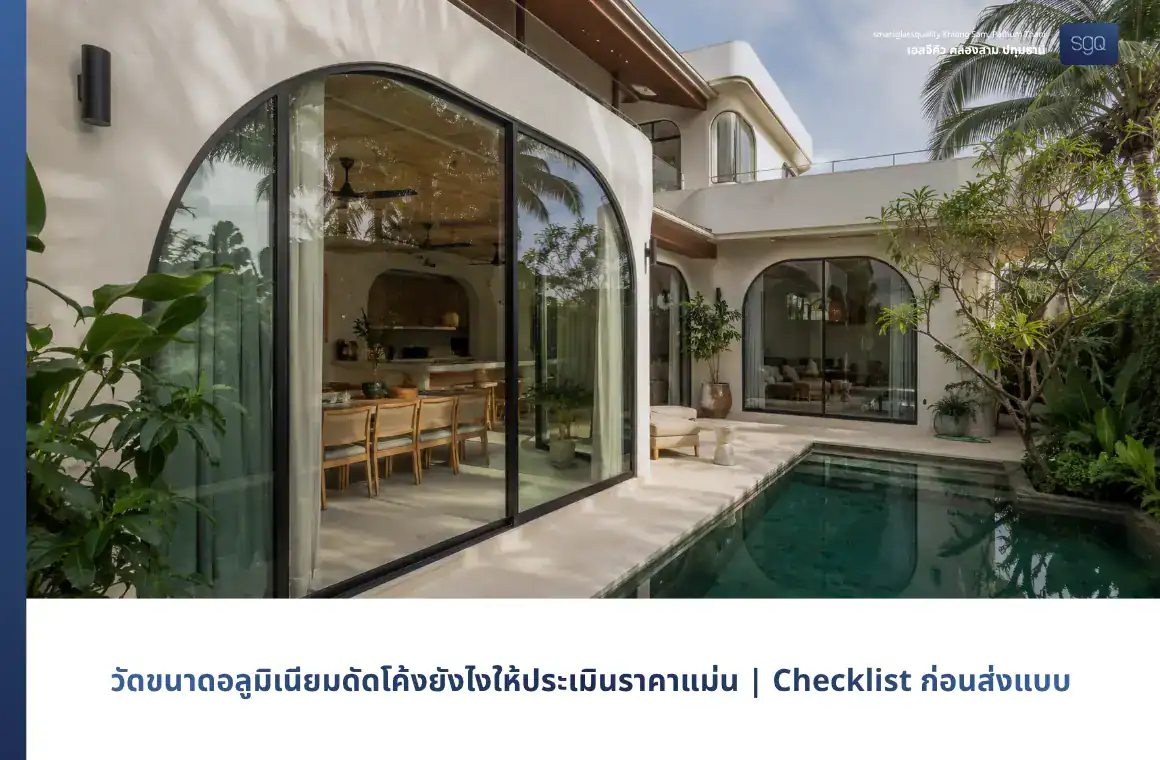
Curved aluminum work is not the same as standard straight-frame work. Sending only “width × height” to the supplier is often not enough for price estimation and actual production, because curved work has additional variables that affect both the price and the accuracy of the design.
This article is created especially for technicians and contractors. It covers measurement methods, key points that must be clearly specified, and a checklist before sending the design, so the supplier can estimate the price more accurately and reduce the chance of repeated corrections.
Why is curved aluminum work harder to measure than straight work?
Straight-frame work usually requires only width and height, but curved work has additional dimensions that must be controlled accurately:
- Curved work has a radius, not just width × height. Different radii can greatly affect the curve shape and the length of the aluminum profile.
- The curve starting point must match both the design and the actual opening. If the curve starting point is off, the entire panel shape can become distorted.
- The frame and glass must align correctly. Curved glass must be cut to match the frame radius precisely. Even a small error can prevent the glass from fitting into the groove.
- If the measurements are incorrect, the assembled work may not fit tightly, and gaps between the straight section and curved section can become clearly visible.
- If the radius is inaccurate, the glass may not fit into the groove, or the seal line may not be complete, which can lead to leakage.
💡 Even a few millimeters of error in curved work can have a greater impact than in straight work, because the curved section must maintain frame symmetry, proper glass fit, and neat assembly lines at the same time.
What should be measured before requesting a price estimate for curved aluminum work?
6 key measurement points technicians should collect before sending the design:
1. Opening Width
Measure the left-to-right distance of the opening. It is recommended to measure at multiple points, such as the top, middle, and bottom, to check whether the opening is square. If the measurements at all 3 points are different, it means the opening may be tilted or the wall may not be straight. This should be reported to the supplier so they can allow for adjustment.
2. Total Height
Measure from the floor or bottom edge up to the highest point of the curve. This is used to calculate the overall frame size. This measurement includes both the straight section and the curved section.
3. Straight-Section Height Before the Curve Begins
This point is very important and is often overlooked by technicians. It indicates where the curved section starts. If it is not specified, the supplier will have difficulty determining the curve shape and may produce a frame with proportions that do not match the required design. The correct way to measure it is to measure from the bottom edge up to the point where the straight line begins to curve.
⚠️ The curve starting point, or Spring Line, is the variable that most often causes curved work to become inaccurate. A semicircular arch and a top arch with the same width but different curve starting points will result in completely different shapes.
4. Curve Radius
If there is a CAD drawing or a hand-drawn plan with clearly specified dimensions, it should be sent to the supplier along with the curve radius. CAD provides more accurate dimensional data than photos, helping the supplier create the design, estimate the price, and plan the frame bending more accurately.
However, if there is no CAD drawing, send the actual opening dimensions, the straight-section height before the curve begins, and site photos from multiple angles instead. The supplier can use this information to review the proportions and calculate the initial curve radius.
5. Curve Style
Clearly specify the type of curve, because each style requires a different bending and calculation method:
- Segmental Arch: a shallow curve with a radius larger than the opening width
- Semicircle: the radius equals half of the opening width
- Elliptical Arch: the horizontal and vertical radii are different
- Full Circle: a round fixed glass opening
- Multi-radius Curve: a custom freeform curve that requires a specific drawing
6. Wall Depth or Installation Distance
This helps the supplier estimate the installation method, frame size, and edge finishing more accurately, especially for work that requires the frame to be embedded into the wall or where an existing frame is already in place.
💬 Not sure what needs to be measured before sending the design?
Send photos of the site to the SGQ team for review — free consultation for technicians and contractors.
💬 Line: @sgqklongsam |📞 081-885-2629
What information should be sent to the supplier if there is no CAD drawing?
Many technicians worry that they cannot request a price estimate without a CAD drawing. In fact, an initial estimate can still be requested if complete photos and information are provided.
Checklist When There Is No CAD Drawing
💡 If there is no CAD drawing, technicians can still request an initial estimate. However, complete photos and dimensions should be provided, because curved work needs to be assessed based on the actual shape, not only width × height.
How does the window or door system affect size measurement?
The window or door system should be selected before taking the final measurements, because each system requires different clearance allowances. If the system is changed after measurements have already been taken, the usable frame size may also change, especially for work that requires allowance for sliding tracks or projects that combine fixed glass panels with casement panels in the same frame.
Fixed curved transom window
This is the easiest type to measure among curved work, because there is no need to allow clearance for hinge hardware, rollers, or locks. Measuring only the opening size and curve shape is enough for an estimate.
Arched casement window
Clearance must be allowed for hardware, hinges, locking points, and the space needed to open the panel. Technicians should measure and specify whether the panel opens inward or outward, as well as the opening direction, so the supplier can design the hinge positions correctly.
Arched sliding window
The sliding track distance, panel overlap area, and limitations of the curved shape must be considered. Curved sliding panels can only be made in certain shapes, so technicians should provide the radius for the supplier to check feasibility first.
Curved Doors
The panel weight, actual height, load-bearing points, and suitable locking hardware for curved work must be considered. Curved doors are heavier than windows, so technicians need to measure and specify all structural information to select the right load-bearing hardware.
Common mistakes technicians often encounter when sending measurements for curved work
- Sending only width × height without specifying the curve starting point, causing the supplier to assume the wrong curve shape
- Not specifying whether the required system is a casement panel, sliding panel, or fixed glass panel, even though the price and clearance allowances are very different
- Not specifying the radius or curve shape, resulting in a highly inaccurate price estimate
- Measuring from an opening before plastering is complete, as the dimensions may change after plastering and cause the finished frame to not fit properly
- Not checking whether the opening is square, as a tilted opening makes curved work harder to install and can look asymmetrical
- Not providing site photos, preventing the supplier from seeing the actual installation limitations
- Not specifying the frame color, glass type, and number of pieces, causing the supplier to ask for more details and estimate again, which wastes time for both sides
Tools and methods for measuring curve radius on an actual site
Method 3: Taking photos with a scale reference
Method 4: Sending a CAD drawing or architectural drawing
Checklist of information to send to SGQ before estimating curved work
Summary table of information to send and why each item is important:
How to measure curved aluminum work for an accurate price estimate
Curved work requires more measurements than straight work, especially these 4 points that technicians often overlook:
- Curve starting point (Spring Line): indicates where the curve begins
- Curve radius and curve style: semicircle, segmental arch, elliptical arch, or multi-radius curve
- Panel system: fixed panel, casement panel, sliding panel, or door — each requires different clearance allowances
- Squareness of the opening: measure at multiple points to check whether the wall is straight.
If the information is complete from the beginning, the supplier can estimate the price more accurately, reduce the chance of producing the wrong design, and help technicians plan the installation more easily. This saves both time and the cost of repeated corrections. In addition to accurate measurement, clear communication with the supplier from the start is equally important. If the information sent does not match what the supplier understands, there is a higher chance that the final work will not match the required design, even if the measurements are correct.
📐 Preparing measurements for curved work? Let the SGQ team help check them.
Send site photos and opening dimensions to the SGQ team, and we’ll help check whether the information is complete enough for a price estimate before actual production — free consultation for technicians and contractors.
Send your curved work design to SGQ for assessment
Have a curved window, curved door, or curved fixed glass panel that needs design preparation? Send site photos, opening dimensions, and the desired design to the SGQ team for an initial assessment. Our team supports technicians and contractors, and is ready to provide advice on measuring and preparing designs for curved work.
📖 Related Articles
What Factors Determine the Price of Curved Windows?
Understand the key factors that affect the cost of curved aluminum work before requesting a quotation.
Curved Aluminum Doors and Windows
Get an overview of curved aluminum work, panel styles, and examples suitable for different home styles.
How Much Do Arched Windows Cost? Factors That Make Curved Aluminum Work Cheaper or More Expensive
See details about pricing, materials, panel systems, and site-related factors that make curved work vary in price.
Summary: How to measure curved aluminum work for an accurate price estimate
- 4 points technicians often overlook — curve starting point, curve radius, panel system, and squareness of the opening
- You can request a price estimate without a CAD drawing — but you need to send site photos, dimensions, the curve starting point, and a reference image of the desired curve shape.
- Always measure after the wall plastering is complete — measuring before plastering can cause the frame to not fit the actual site.
- Measure 3 points for each dimension — top, middle, and bottom — to check the squareness of the opening and allow for adjustment.
- Confirm the design with the supplier before production — curved work is much harder and more expensive to fix after production than straight work.
Frequently Asked Questions: Measuring Curved Aluminum Work
1. Should the opening be measured before or after wall plastering?
It should always be measured after the wall plastering is complete, because plastering can change the opening size by several centimeters. If measurements are taken from an unfinished opening and production is ordered, the finished frame may be too large or too small to fit properly. If it is necessary to measure before plastering, the supplier must be informed so they can allow for the plaster thickness. Clearly specify how many millimeters of plaster will be added to the wall.
2. Can curved work be ordered if the opening is tilted or not square?
Yes, it can. However, the supplier should be informed from the beginning, and the measurements from all 3 points (top, middle, and bottom) should be provided if they are different. The supplier can design the frame with allowance for on-site adjustment or recommend correcting the opening first if it is too tilted. Hiding the fact that the opening is tilted can cause the curved work to fit poorly and look asymmetrical, which is much harder and more expensive to fix than informing the supplier from the start.
3. For multiple curved pieces in the same design, should every piece be measured, or is one design confirmation enough?
It is recommended to measure each opening separately, even if they appear to be the same size, because construction work can have deviations at each point. This is especially important for renovation projects, where walls may have settled or tilted differently. If only one piece is measured and all pieces are produced in the same size, some openings may not fit properly. If multiple openings are on the same wall line and were newly built at the same time, 2–3 representative points may be measured and sent to the supplier for review.
4. If the CAD drawing already clearly specifies the radius, is an on-site measurement still needed?
Yes, on-site measurement is still needed. The CAD drawing is used as a reference for the shape and radius, but the actual opening size on site may still differ from the drawing, especially if there are construction deviations. Always measure the actual site before ordering production, and inform the supplier if the measurements differ from the CAD drawing so the production design can be adjusted to match the actual site.
5. After all information has been submitted, will the supplier confirm the design before production?
A professional supplier should always send a drawing or sketch back for confirmation before actual production, especially for curved work. Curved work is much harder and more expensive to correct after production than straight work. Joint design confirmation helps both parties understand the shape in the same way. If the supplier does not have this step, technicians or contractors should always request a confirmation drawing before giving approval for production.
About the Author
Written by the SGQ Khlong Sam Technician Team Manufacturer and installer of curved aluminum work, doors, windows, and curved fixed glass panels in Pathum Thani and Bangkok. For both residential projects and contractor projects. The information in this article is based on real experience from the SGQ team.
For Aluminium Contractors & Installers
If you need aluminium profiles, quality glass, premium hardware, custom cutting & fabrication, installation tools, or on-site technical advice,
you can contact us at:
• Line : https://lin.ee/Wkn1Ong
• Tel : 081-885-2629
• Facebook : Smartglassquality
For Homeowners & Project Owners
If you are looking for aluminium door–window installation, glass works, sliding and swing systems, room partitions, or high-quality materials for home renovation
you can contact us at:
• Line : https://lin.ee/Wkn1Ong
• Tel : 099-392-1963 , 097-936-1449